Optimizing Website Images

You shouldn't add a photo to your website right from your camera or phone. A lot of things have to be done to an image before it can be used on your website.
All websites should include images. They hold the attention of your website's visitors, improve user experience, and even help with search ranking. But adding images to your website is not as simple as uploading photos from your phone or camera and plopping them on your website.
- The file size of the image itself tends to be very large, which slows down the loading of your website (a Google ranking signal).
- Photos taken directly from a camera or phone can look blurry, distorted, pixelated, jagged or "bitmappy" on the website because the viewing size is too large, but is being cropped using website coding instead of using an image that's smaller to begin with.
- The image may be not be cropped or dimensioned correctly, or may be too dark, inherently blurry, discolored, etc.
Some of the optimizations that may need to be done to images before they're added to your website include:
In order to get the photo to fit in a certain spot on the web page, the image size (number of pixels) and dimensions (height and width) will need to be changed. A photo from a phone or camera can be huge. Let's say the photo is 2000 pixels high by 6000 pixels wide, and the file size is 1MB. The space on the web page where you want to place the image may be, say, 200 pixels high by 600 pixels wide. Many web designers make the mistake of keeping the image the original size but using website code to adjust the size of the image (because it's faster than taking the time to optimize the image). This can cause the photo to look blurry and also make the page load slowly since the size of the image file has not been reduced. The right thing to do is reduce the number of pixels in the image itself (using a photo editor like Photoshop) to 200 x 600, which may reduce the file size to, say, 200K.
An image file from a camera can be several megabytes in size (this is different from the image size, which is measured in pixels). The web page will have trouble loading a photo of such a large size, which can stall the page or cause it to take too long to load. Not only will visitors to your website grow impatient, but page load time is a major search ranking factor. The best way to reduce the size of a photo file is by using photo editing software. The smaller the image size, the grainier or blurrier it will become, so this must be done visually and manually, saving the photo at the lowest file size in which the photo quality is still satisfactory. So in addition to reducing the pixel size of the image, the web designer should also change the file size of the image, which reduces the file size even more than just reducing pixel size.
Even after the pixel and file size of the image are reduced, the size can be reduced even further by converting the image to the newer "webp" format. This must be done manually and visually, as images resulting from automated webp converters can end up looking fuzzy or bitmappy because the size was reduced too much.
As you can see, the entire process for optimizing just one image for a website - the PROPER WAY - can take a long time, which is why most web designers choose not to do it at all.
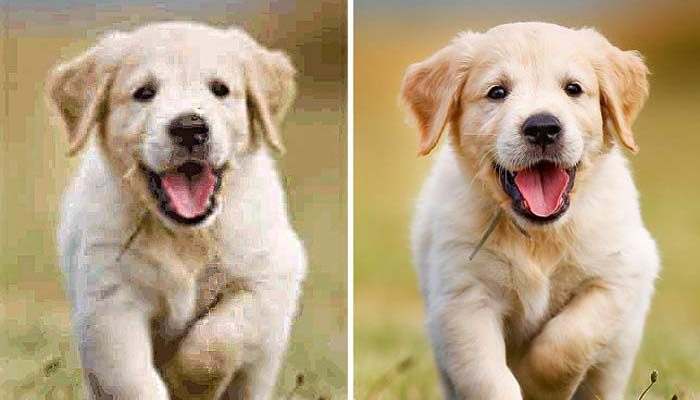
Example of Reducing Image Size and File Size for a Website
The two images below are both sized to 355 pixels wide and tall using website coding.
- The first image is 710 pixels wide and tall, but simply reduced in size with website coding, and the file size of the image is 272KB.
- The second image itself is actually 355 pixels wide and tall in size. If I left the quality at 100% (just as sharp and clear as the original), the reduction in pixel size would reduce the file size from 272KB to 90KB.
- But I can reduce the file size even more by lowering the quality of the image. In this case, I took the 355px image and reduced its quality to 51% of the 710px original, which reduced the file size from 90KB to only 24KB. If you look closely, you can see that the second image is not as crisp as the first, but it's not enough to be noticeable. I can always bump up the quality a bit. If I increase it to, say, 65% of the original instead of 51%, now the file size is 30KB. As you can see, this kind of detail can only be achieved manually, by eye.


Suppose you want to add a photo to a space on the website that's 200 pixels high by 800 pixels, but the photo is 200px by 600px? You have to either crop out the portion of the photo that is not needed, otherwise stretching or squeezing the photo to fit will distort the image and make it look too wide or narrow. Adjusting photo dimensions is a trial and error process and one solution does not fit every image.
Often a photo coming directly from a camera or phone may be too dark, or blurry, or the colors may be muddy, or you might even want some elements of the photo cropped out. Optimizing the photo for brightness, contrast, color saturation, sharpness, etc. assures that the photo will look its best on your website.

Google Search Ranking
- Where Is Your Website Ranking In Google?
- Google Search Ranking Factors
- Google Search Ranking Secrets
- Ranking for Multiple Services & Products
- Ranking for Multiple Cities and Counties
- Ranking on Page One of Google
- Is Your Website Search Friendly?
- What is Google Search Console?
- What is Google Analytics?
Websites
- How Much Does a Website Cost?
- How to Find a Good Web Designer
- Is Your Website Designed Properly?
- Reasons Why You Don't Want a Website
- Should I Get a WordPress Website?
- Is Your Website Outdated?
- Optimizing Website Images
- Wide or Panoramic Images on Website
- Is Your Text Really an Image?
- Website Page Speed & Search Ranking
- Email Contact Form
Domains and Hosting
- Domain Names and Web Hosting
- Lost Domain or Hosting Password
- Get Domain Back from Web Designer
- Domain Name Theft
- Domain Name Email Scams
Online Marketing
- Increase Marketing in a Bad Economy
- Home Improvement Spending Slowed
- How to Get Customer Reviews
- How to Handle Negative Reviews
- Thryv, Dex Media, DexYP and Hibu
- How to Cancel Thryv (Dex Media)
- Free Online Advertising
- Google Business Listing Scams

